
From a Hand-Carved Wooden Sample to a 3D Printed Wall Mount
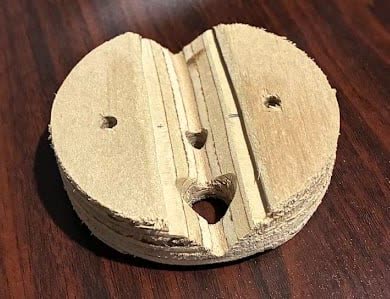
Some jobs arrive as a sketch, some as a broken part. This one arrived as a piece of wood. The customer had carved a sample by hand to prove the idea: a round block with a V-groove cut across the back, so it sits astride the raised rib of a trapezoidal sheet wall and gives you a flat face to fix things to. It worked, but a hand-carved block is a one-off, and it is plywood on the outside of a building.
Step 1: the brief was a piece of wood
This is what we were handed. You can see the whole idea in it already: the round body, the V-groove across the back that straddles the rib, and the holes for fixings. Hand-carved, a bit rough around the edges, and completely clear about what it needed to do. As a starting point it beats a written spec.
Step 2: measured and pinned down
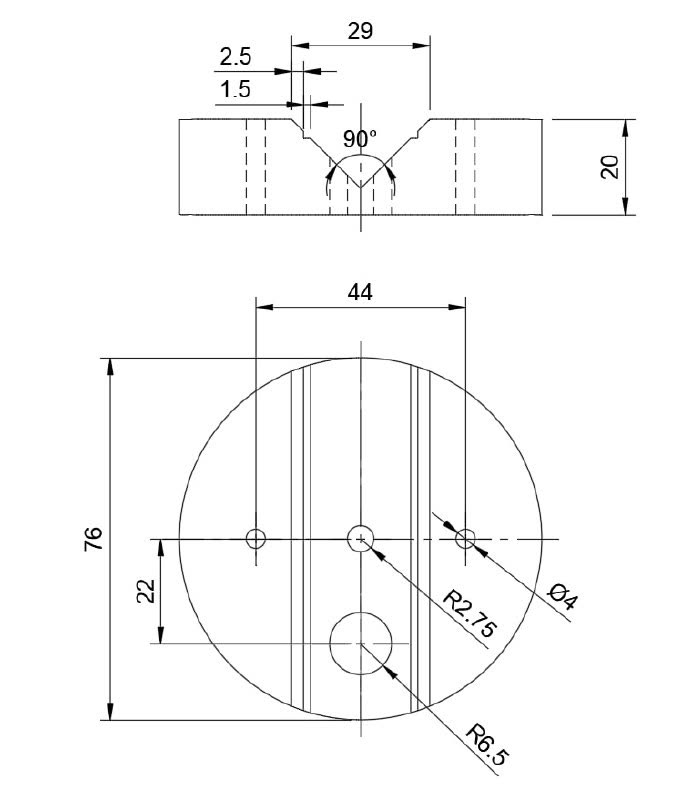
Before anything can be made repeatably, the shape has to stop being approximate. We worked the sample into a dimensioned drawing: 76 mm across, 20 mm thick, a 90 degree V-groove on the back face, three fixing holes along the centre line and a larger one below them. From here on, every part comes out the same.
Step 3: built as a 3D model
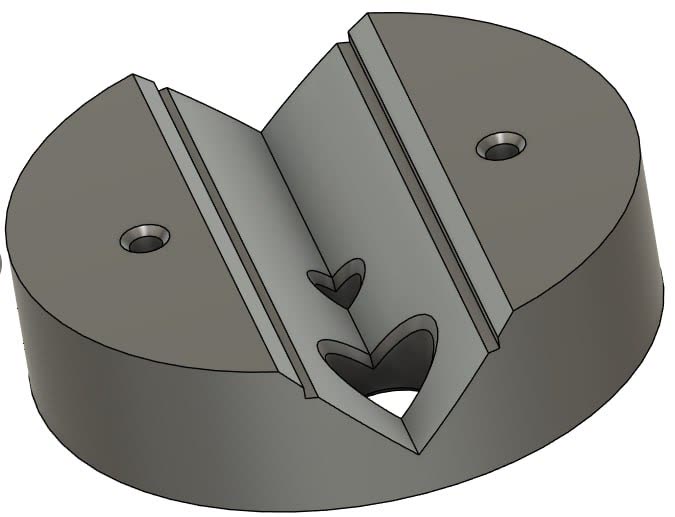
The drawing becomes a 3D model, and this is where the details get decided properly: the angle of the groove so it seats on the rib without rocking, the depth of the counterbores so the fixings sit flush, and a front face left completely flat and smooth so the customer can mount whatever they need to onto it.
Step 4: printed and handed over
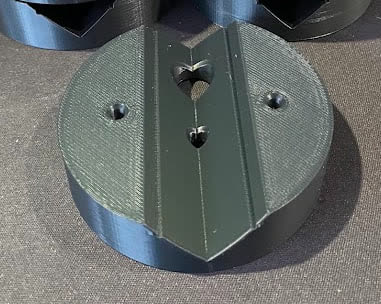
The finished parts were printed in black ASA and handed over to the customer. ASA is the choice here because this lives outside: it holds up to UV and weather far better than the usual printing plastics, which go brittle and chalky after a season in the sun. The layer lines you can see are the surface as it comes off the printer, not a defect.
What it is for
The front face is deliberately plain. The mount's job is to give you a solid, flat surface on a wall that does not have one, so whatever you need to attach has something square to sit on rather than a corrugated panel.
That flat face is the point. A sheet wall gives you nothing square to fix into, so anything you want up there has to bridge the ribs somehow. The mount does that part, and what goes on it is up to you.
If you have already solved something in wood, cardboard or tape, that is a better brief than most. Send us a photo of it and we will tell you what it would take to make it properly.
Got a similar project?
Send us a photo or a description and we will come back with an honest assessment and a quote.
Get a Free QuoteAlready have an STL file? Price it in your browser →